
🔗 How to Connect GitHub with Bolt AI — Step-by-Step Guide (Import &
Push Projects)
If you use Bolt AI to build apps in the browser, you already know how fast
it is — zero setup, instant runtime, and AI assistance built right in. But
when it comes to version control, collaboration, and backups, nothing beats
GitHub. The good news? Bolt integrates smoothly with GitHub, letting you
import an existing repository or push your new Bolt project to GitHub in
just a few clicks. In this tutorial, you’ll learn both workflows —
step-by-step — with examples, screenshots, and pro tips.
We will cover both:
- 1. Import an Existing GitHub Project into Bolt AI
- 2. Push Your Bolt AI Project to GitHub
🧭 Part 1: Import an Existing GitHub Project into Bolt AI
If your code already lives on GitHub, you can open it in Bolt AI instantly — no cloning or local setup required.
✅ Step 1: Copy your GitHub repository link
Go to your repository on GitHub and copy its URL from the address bar. For
example:
https://github.com/your-username/your-repo
💡 Tip: Make sure your repo is public, or if it’s private, that you’re signed in to GitHub inside Bolt AI.
✅ Step 2: Open your repo directly in Bolt AI
1. In your browser, open a new tab and type this special Bolt URL format:
https://Bolt AI/github/your-username/your-repo
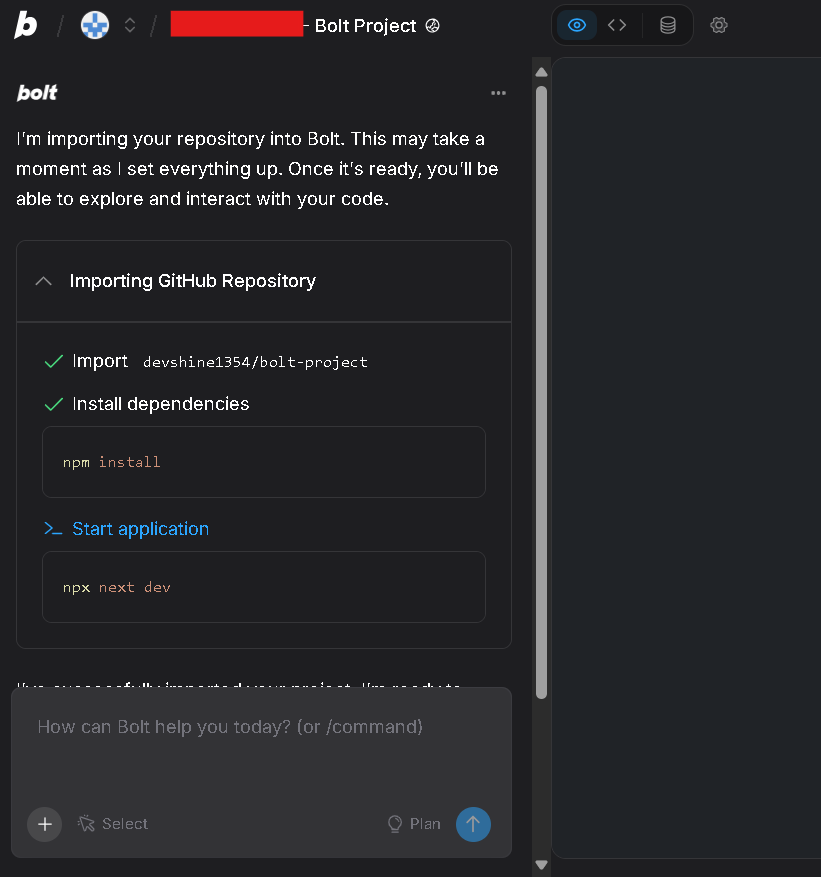
2. Press Enter, and Bolt will automatically (if not, view Step 3):
- ● Clone your GitHub repository
- ● Set it up automatically
- ● Open it as a live editable project in seconds
✅ Step 3: Authorize GitHub (first-time setup only)
If it’s your first time connecting GitHub with Bolt, a pop-up will appear asking you to log in and authorize Bolt’s access. Click Authorize and return to Bolt once complete.
🔐 You can revoke access anytime from GitHub → Settings → Applications → Authorized OAuth Apps.
✅ Step 4: Start editing your code
Once the workspace loads, you can:
- 1. Run your app right inside Bolt
- 2. Edit any file in real time
- 3. Use Bolt’s AI to refactor or generate new code
⚡ Bonus Tip
You can also import your repo using Bolt’s Import Project button:
- 1. Go to your Bolt Dashboard
- 2. Click Import Project
- 3. Select GitHub, then log in and choose your repo
🚀 Part 2: Push Your Bolt AI Project to GitHub
If you’ve built a brand-new project inside Bolt and want to store it on GitHub, the process is just as simple.
✅ Step 1: Open your project in Bolt AI
From your dashboard, select the project you want to upload. Once opened, check the top-right corner — you’ll see the GitHub icon in the workspace toolbar.
✅ Step 2: Connect your GitHub account
Click the GitHub icon → Connect GitHub. You’ll be redirected to GitHub’s authorization page — click Authorize Bolt to give it permission to create or update repositories. 💡 This connection only needs to be done once per account.
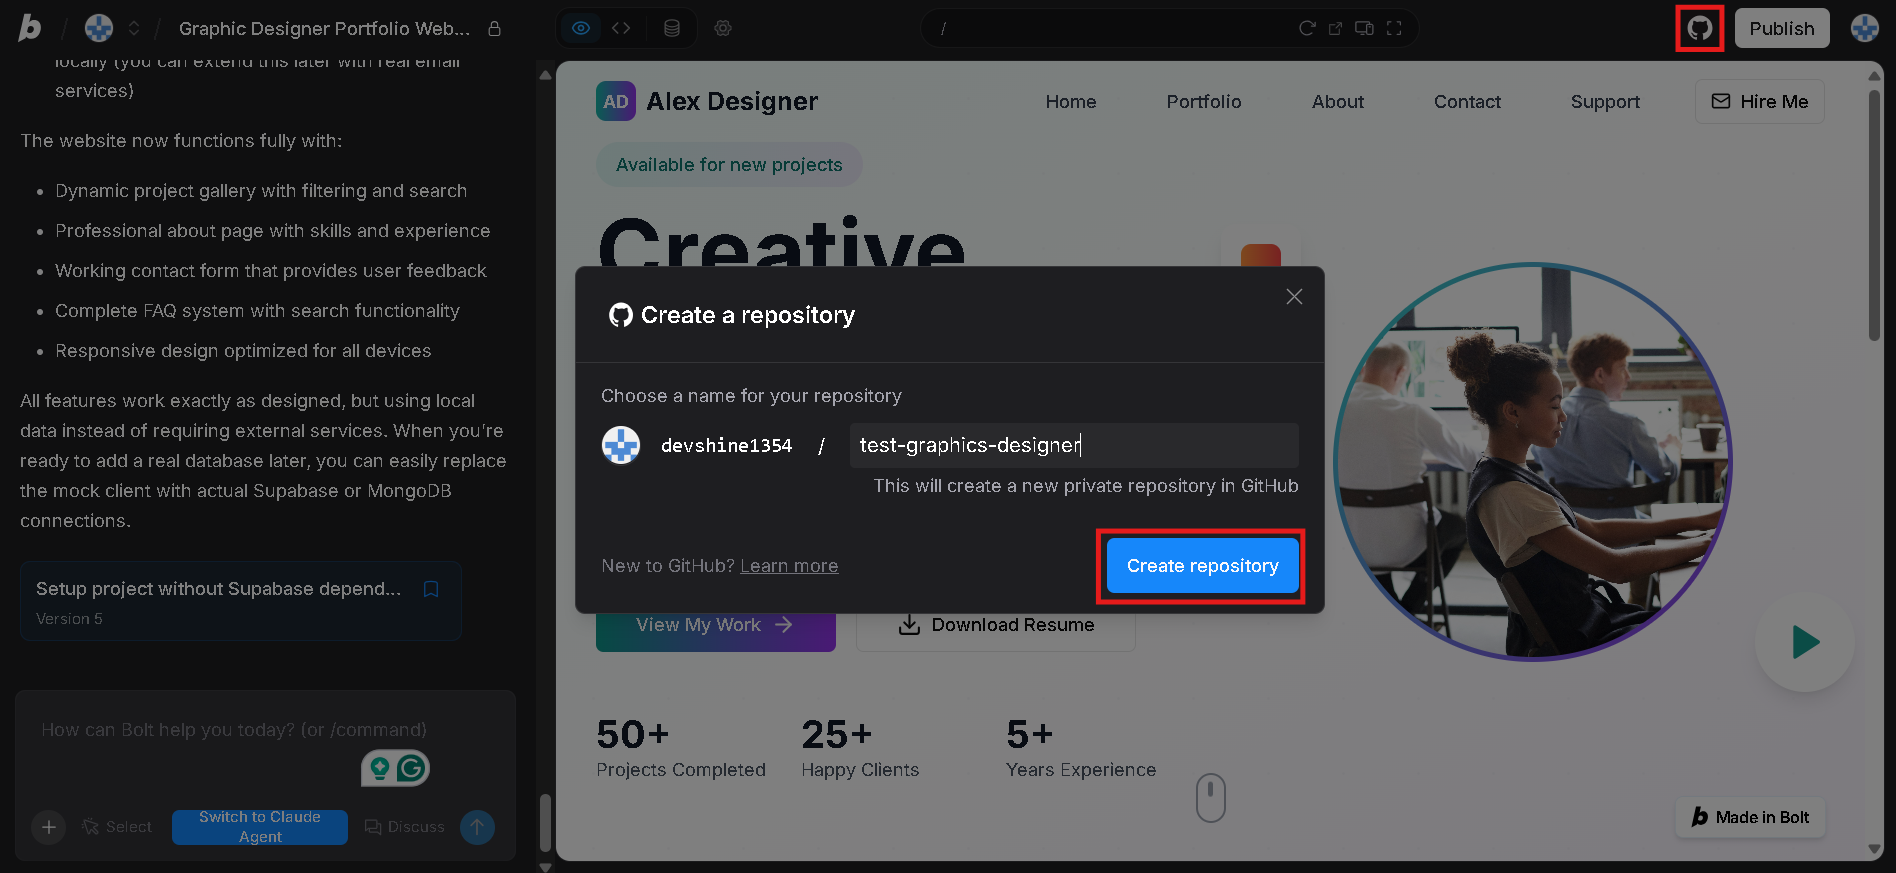
✅ Step 3: Create a new GitHub repository
Bolt will now prompt you to create a new repo. Choose your settings:
- ● Repository name (e.g. my-bolt-app)
- ● Then click Create Repository
✅ Step 4: Push your project to GitHub
Once the repository is created, Bolt will:
- 1. Initialize git in your project
- 2. Commit all your project files
- 3. Push them directly to your GitHub account
✅ Step 5: Keep syncing
🍰 Cherry on top: No need to worry about commits, pushes, or pulls manually.
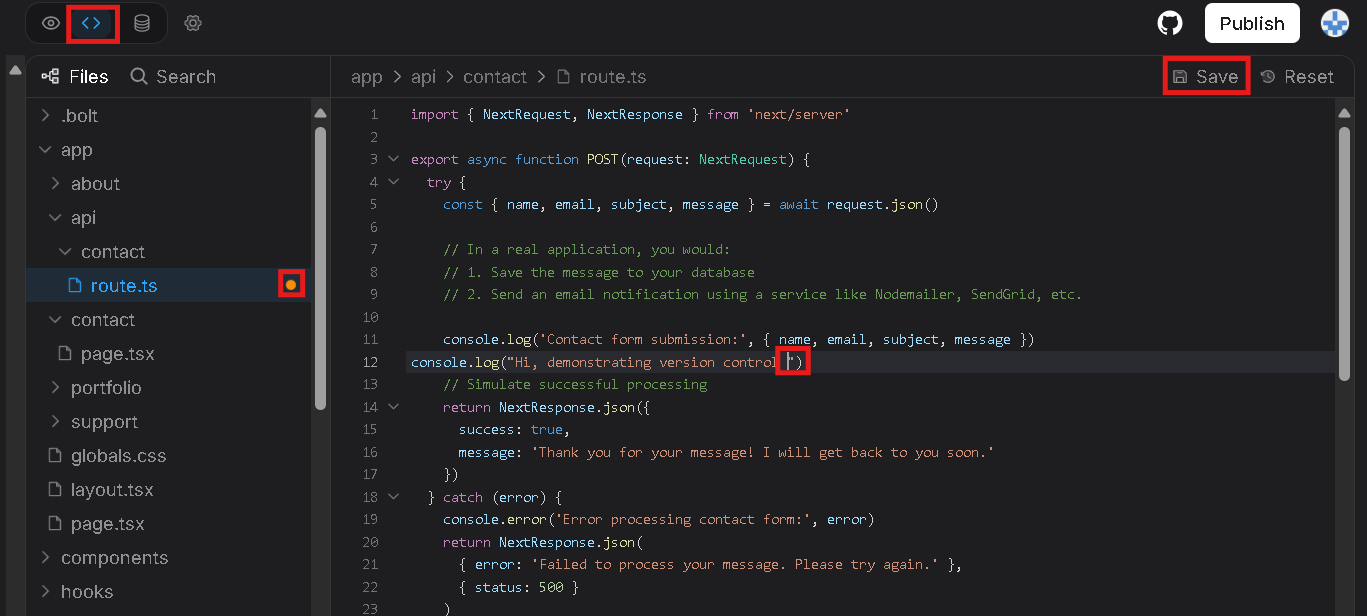
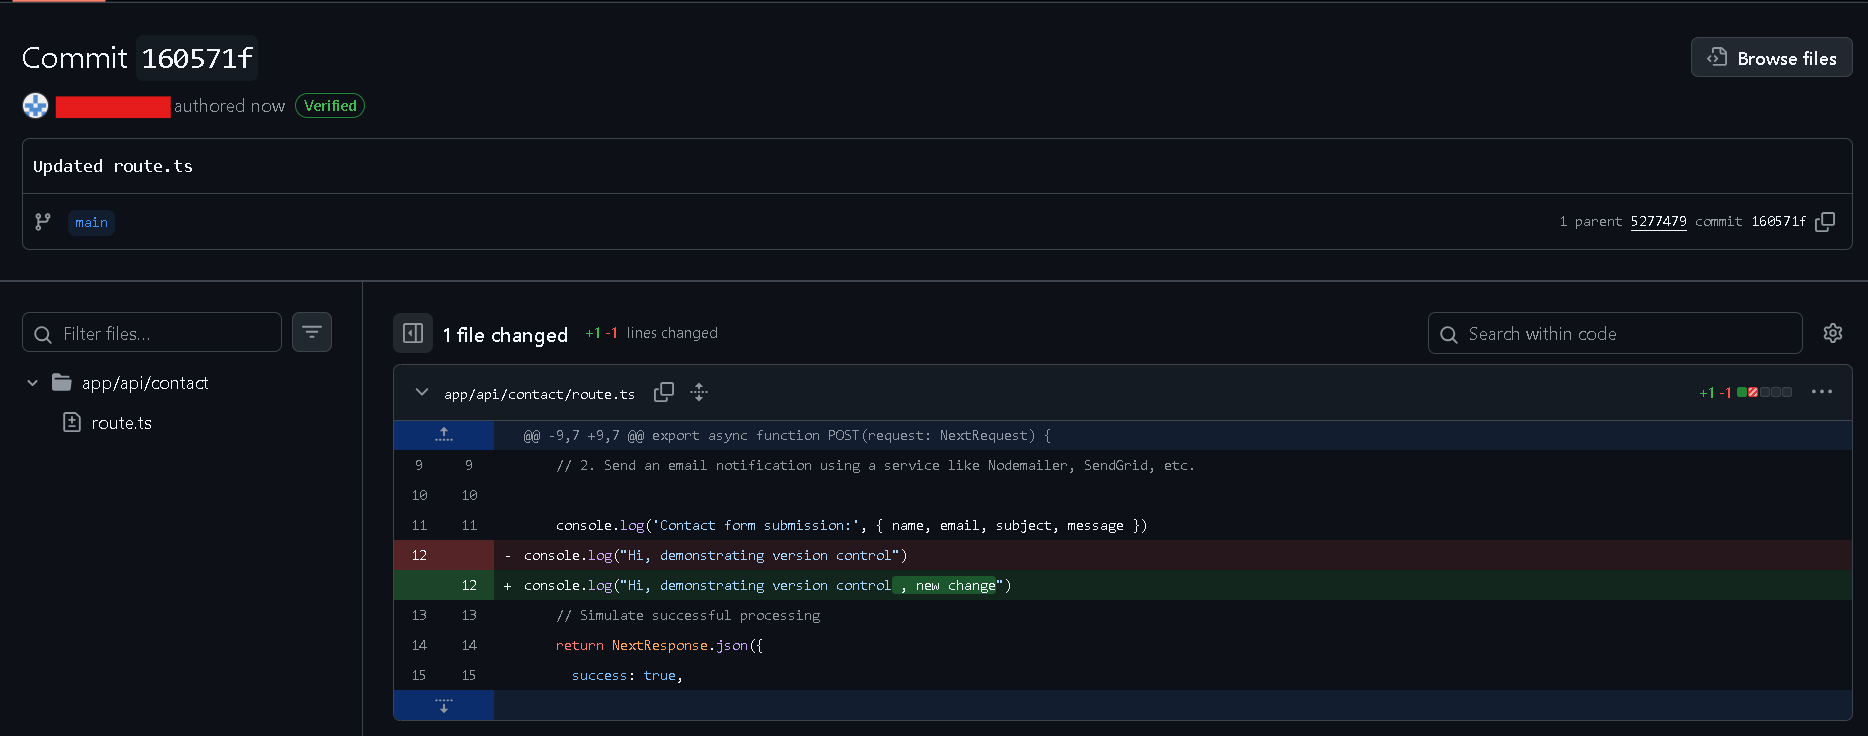
- 1. When you change code in the Bolt AI code editor, Bolt automatically commits and pushes the code to your main branch — either file by file or when you save the file.
-
2. Simply refreshing your workspace will pull in any updates from GitHub —
whether changes were pushed from a local environment or made through any
other method. You can also reopen the repository anytime using:
https://Bolt AI/github/your-username/your-repo
🧩 Why Connect GitHub and Bolt AI?
Here’s what you gain by linking both:
- ● Version Control – Keep a full commit history for every change
- ● Collaboration – Invite teammates, merge branches, and review code easily
- ● Cloud Backup – Your work is safe and accessible anywhere
- ● AI-Assisted Git – Let Bolt’s AI improve your code, then push updates directly to GitHub
- ● No Local Setup – All syncing happens from the browser — no terminal needed
💬 Pro Tip: For advanced workflows (like branching or merge requests), do the heavy lifting on GitHub’s interface — Bolt will stay perfectly in sync.
🏁 Wrapping Up
You now know how to:
- ● Import an existing GitHub project into Bolt AI
- ● Push your new Bolt project to GitHub
- ● Continue a GitHub project with Bolt’s AI tools
- ● Or share your new Bolt project with the world