
'
Learn how to generate, configure, and secure your Google Maps API key for your website or web app. This step-by-step guide helps you integrate Google Maps, Places, and Geocoding APIs safely and effectively.
Table of content:
1. Introduction
If your web app uses maps for location selection, tracking, or navigation, you’ll need a Google Maps API key. This key connects your project to Google’s services and authorizes usage of Maps, Places, and Geocoding APIs.
Step 1: Create a Google Cloud Project
Follow these steps to create a new Google Cloud project:
- 1. Go to the Google Cloud Console.
- 2. Click the project "Select a project" as shown in Figure 1 dropdown at the top and select “New Project.” at the top right corner of the pop-up.
- 3. Give your project a name (e.g., my-maps-app) and click Create.
- 4. Once created, select your new project from the dropdown.

Figure 1
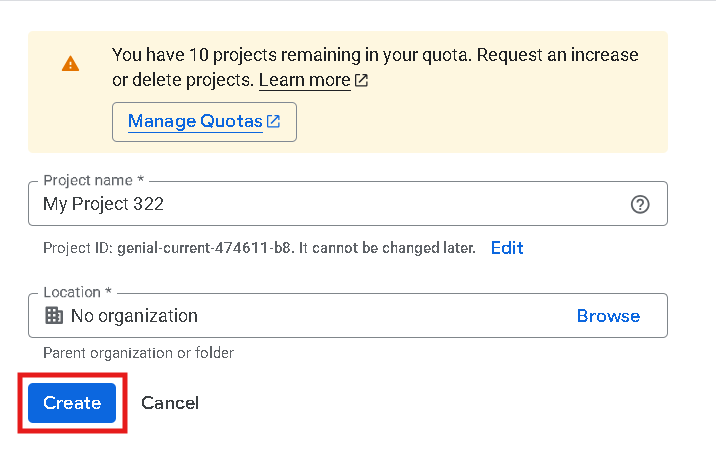
Figure 2
Step 2: Enable the Required Google Maps APIs
You need to enable the APIs your project will use:
- 1. In the Cloud Console, go to APIs & Services → Library.
-
2. Search for and enable the following APIs:
- • Maps JavaScript API (for web maps)
- • Geocoding API (for address ↔ coordinates)
- • Places API (for autocomplete and location details)
- • Directions API (for route generation)
- 3. When enabling, Google may ask you to verify billing by adding card details. Don’t worry — Google offers $200/month in free usage. If it expires, the service stops automatically without charging you unless you upgrade.
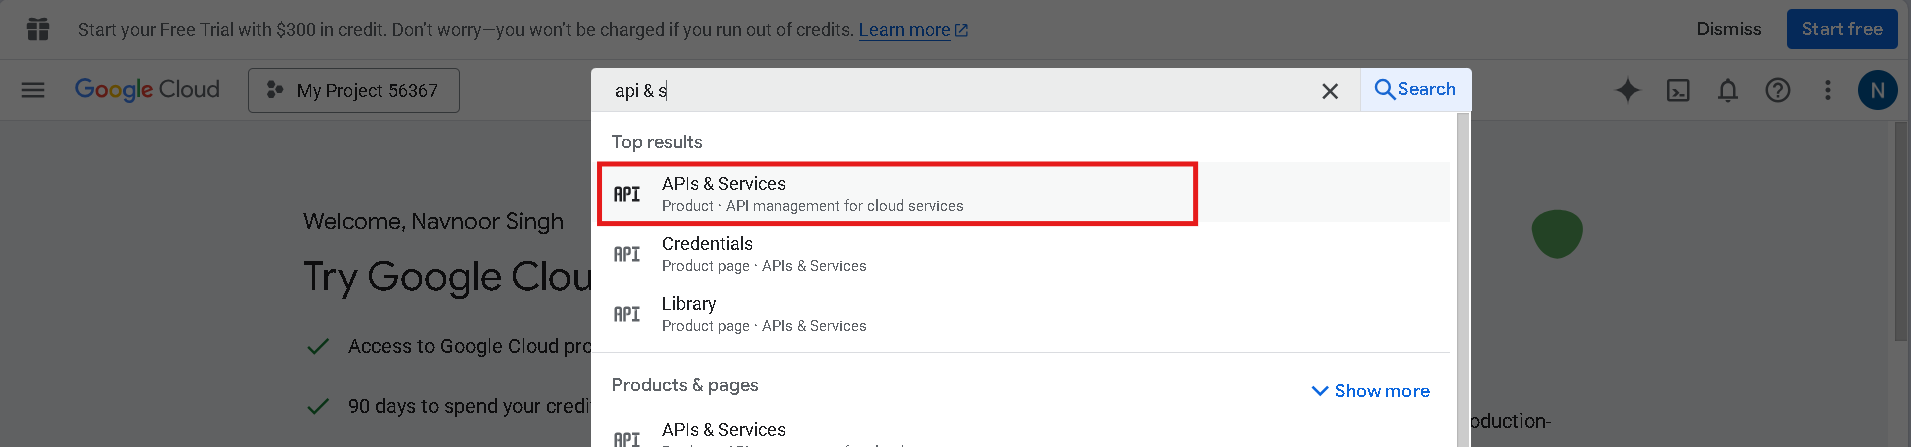
Figure 3

Figure 4
Step 3: Create an API Key
- 1. Go to APIs & Services → Credentials.
- 2. Click + Create Credentials → API key as shown in Figure 5.
- 3. In right side bar you will see as shown in Figure 6, click on Create button.
- 4. A popup will display your new key as shown in Figure 7 — copy it safely; you’ll need it in your code.
Figure 5
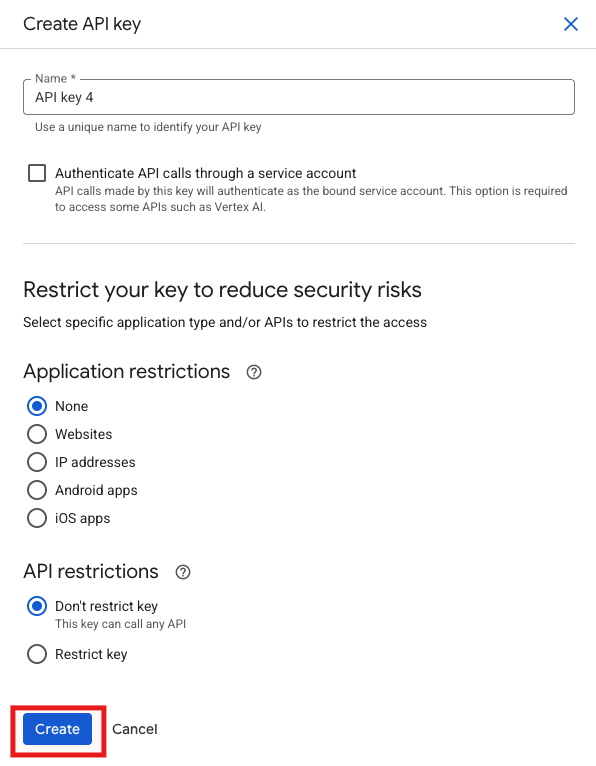
Figure 6
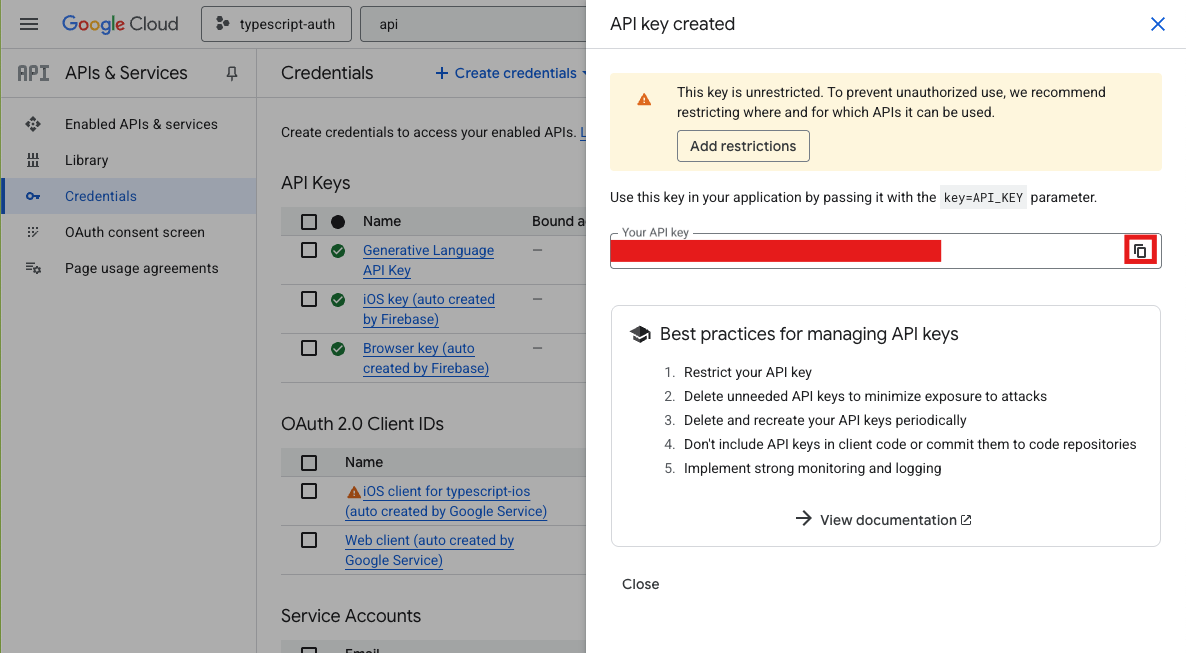
Figure 7
Important: By default, the key is unrestricted, meaning anyone could use it. After google map integration from this blog, you can focus on that.
Step 4: Add the Key to Your Project
Install the Google Maps package for React:
npm install @react-google-maps/api
Then, add it to your code:
import { GoogleMap, LoadScript } from "@react-google-maps/api";

const containerStyle = { width: "400px", height: "400px" };
const center = { lat: 28.6139, lng: 77.2090 }; // Example: New Delhi

function Map() {
  return (
    <LoadScript googleMapsApiKey={process.env.REACT_APP_GOOGLE_MAPS_API_KEY}>
      <GoogleMap mapContainerStyle={containerStyle} center={center} zoom={10} />
    </LoadScript>
  );
}

export default Map;
Store the API key securely in your .env file:
REACT_APP_GOOGLE_MAPS_API_KEY=your_api_key_here
Restart your app after adding it.
In the route containing above component, you will see:
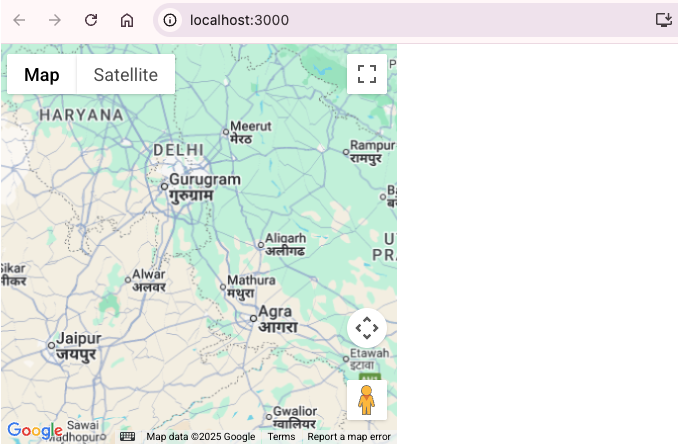
Figure 8
Step 5: Test Your Integration
Run your app and verify if the map loads correctly.
- ✅ The map should appear with no gray screen or “API key invalid” message.
-
🔍 If errors appear, check that:
- • The API key is correct.
- • The correct APIs are enabled.
- • The restrictions match your domain or app configuration.
7. Conclusion
You’ve successfully created and integrated your Google Maps API key into your web project! Now you can use advanced map functionalities like autocomplete, directions, geocoding, and live maps safely and efficiently.
Remember to monitor your key usage and keep it private to prevent unauthorized access.