We are using Cloudinary because it allows us to upload media without requiring credit card details.
Step 1: Create a next app:
npx create-next-app@lastestStep 2: Install Dependencies:
npm i next-cloudinaryStep 3: Setting Up Global Environment Variables
Visit Image and Video Upload, Storage, Optimization and CDN (cloudinary.com)
After signing in or creating an account, go to Settings. (as shown in Figure 1 )
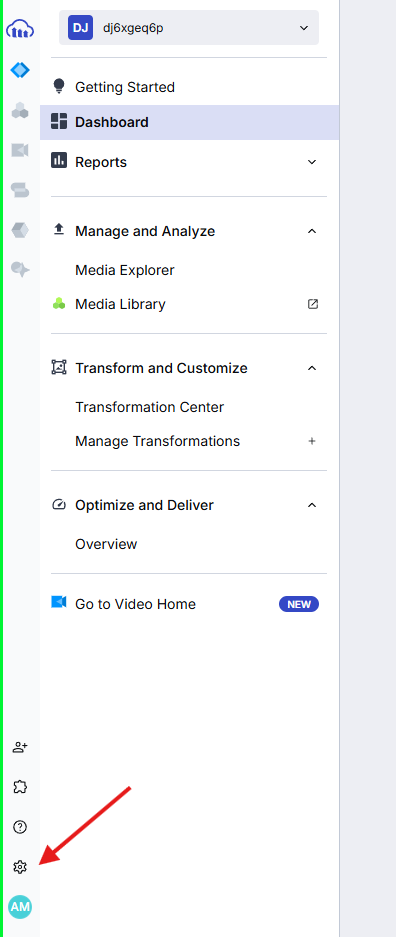
Figure 1
Select API keys tab in sidebar. (as shown in Figure 2)
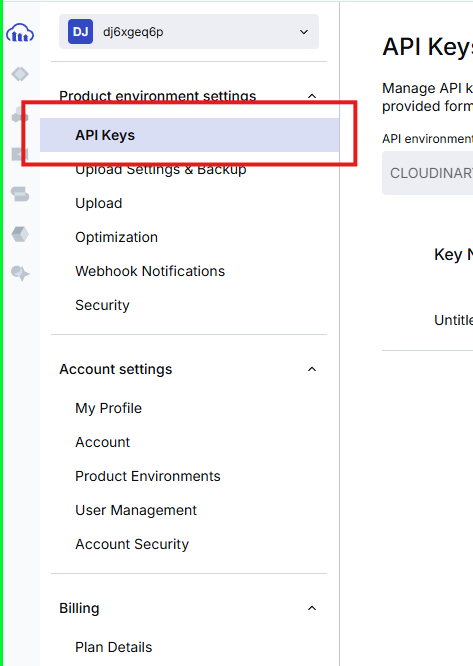
Figure 2
Then click on, Generate New Api Key
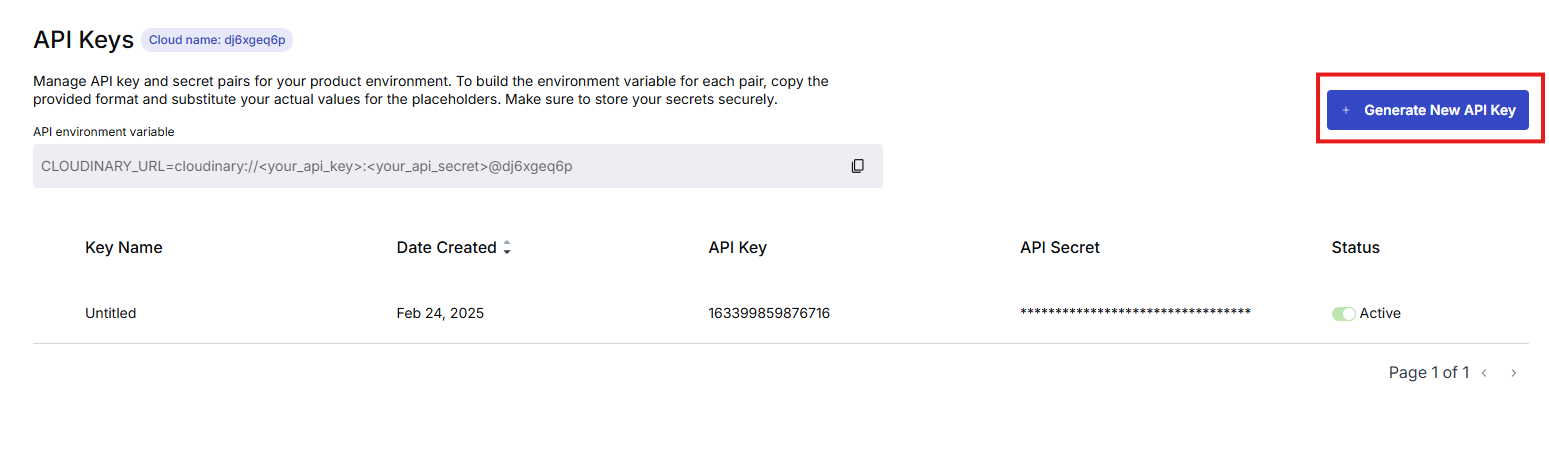
Figure 3
After clicking on it, a verification code will be sent to your email. Enter the verification code in the popup.
An API key will then be generated. Copy the API Key and API Secret. (as shown in figure 4)
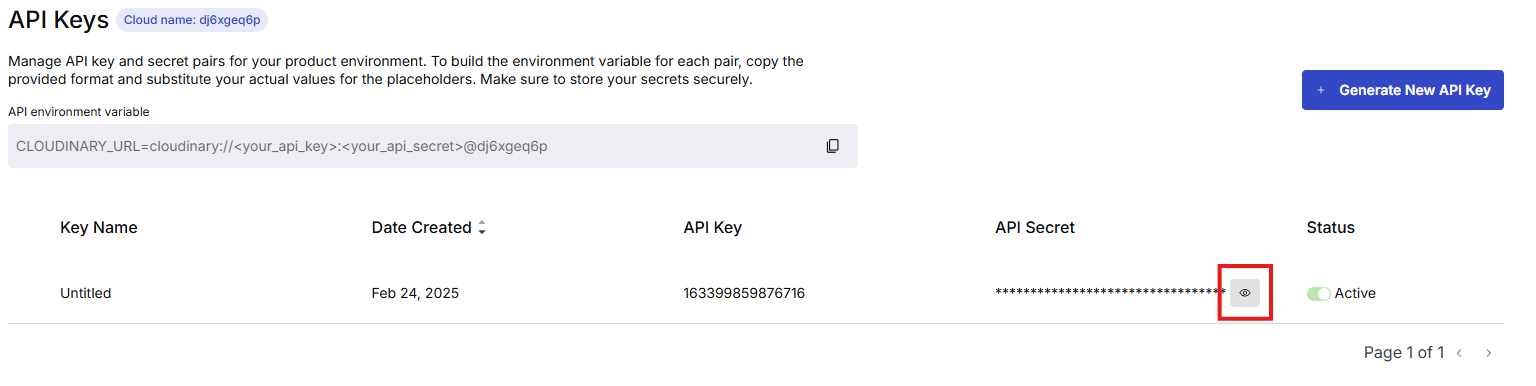
Figure 4
Add the following variables to your .env.local or .env file.
You will get NEXT_PUBLIC_CLOUDINARY_CLOUD_NAME from (as shown in figure 5)
-
NEXT_PUBLIC_CLOUDINARY_API_KEY="
" -
NEXT_PUBLIC_CLOUDINARY_CLOUD_NAME="
" -
CLOUDINARY_API_SECRET="
"
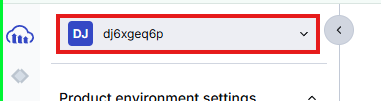
Figure 5
Step 4: All code that you need
    "use client";
    import { CldUploadWidget } from "next-cloudinary";
    import React from "react";

    const page = () => {
      return (
        <section className="p-40 space-y-10 bg-white">
        <h1 className="text-5xl text-center text-black">Upload Image</h1>
        <div className="flex justify-center">
          <CldUploadWidget
            uploadPreset= "any-text"
            onSuccess={(results, { widget }) => {
              console.log(results, widget);
            }}
          >
            {({ open }) => {
              return (
                <button
                  type="submit"
                  className="bg-black rounded-md px-6 py-3"
                  onClick={(data) => {
                    open();
                  }}
                >
                  Upload an Image
                </button>
              );
            }}
          </CldUploadWidget>
        </div>
      </section>
      );
    };

    export default page;
Output:

Figure 6
Click on the button.
Congratulations( ́◡ ):❁❁
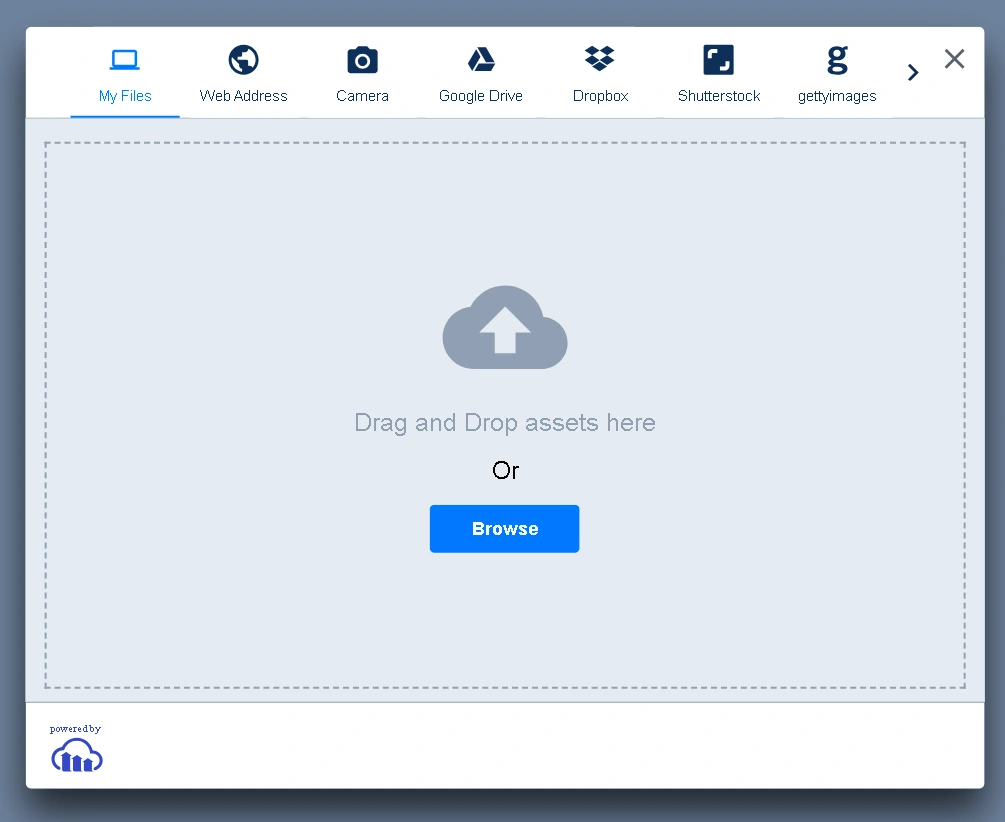
Figure 7
As you can see we have many options available to upload.
Step 5: Browse and select Image
The Image URL:
In the above code, note the results object:
<CldUploadWidget
    uploadPreset= "any-text"
    onSuccess={(results, { widget }) => {
      console.log(results, widget);
    }}
  >
Step 6: Extract url from the response
The output of the results object in the browser console:

Figure 8
The url key is the path of your image, now you can store it in the cloudinary.
Step7: View and Manage Images
To watch were the images are stored www.cloudinary.com => Media explorer